
Organizing made Easy with the Brother P-touch Cube Plus Label Maker
- Tara M Stewart
- Apr 6, 2023
- 3 min read
Updated: Jan 3
DISCLOSURE: THIS POST CONTAINS AFFILIATE LINKS, MEANING I MAY GET A SMALL COMMISSION IF YOU DECIDE TO MAKE A PURCHASE USING LINKS PROVIDED. HOWEVER, THERE IS NO COST TO YOU. AS AN AMAZON ASSOCIATE, I EARN FROM QUALIFYING PURCHASES. VIEW THE FULL DISCLOSURE HERE
The question I get more than ANY other is “What label maker do you use?”
The short answer:
Brother P-touch CUBE Plus PT-P710BT * and we use this case co2CREA Hard Case *

Okay thanks for reading today's blog.
Just kidding.. inside scoop below
Now for those of you want that want more of the inside scoop on why we love this particular label maker, as well as what drives us nuts - read on my blog loving friends.
Full transparency - I have NOT tried every label maker! I have purchased this label maker four times, one for each of our work bags, and all of us use it on a daily basis. We’ve all been pleased with how easy it is to use and to set up. Since this little workhorse hasn’t let us down yet, I have seen no need to try a new one.
So without further ado here is why I LOVE this label maker:

It connects to our phone via Bluetooth. ‘Nough said.
It has a rechargeable battery with a very long life. Meaning we don’t need to be near an outlet when using the label maker. You recharge the label maker using the USB cord it comes with.
It works with Apple and Android as well as with a Mac. Our team members are all part of the iPhone cult so I can only speak to how well it works with the mobile app for iPhone.
You can use SIX different size label tape:
.13”
.23”
.35”
.47”
.70”
.94”
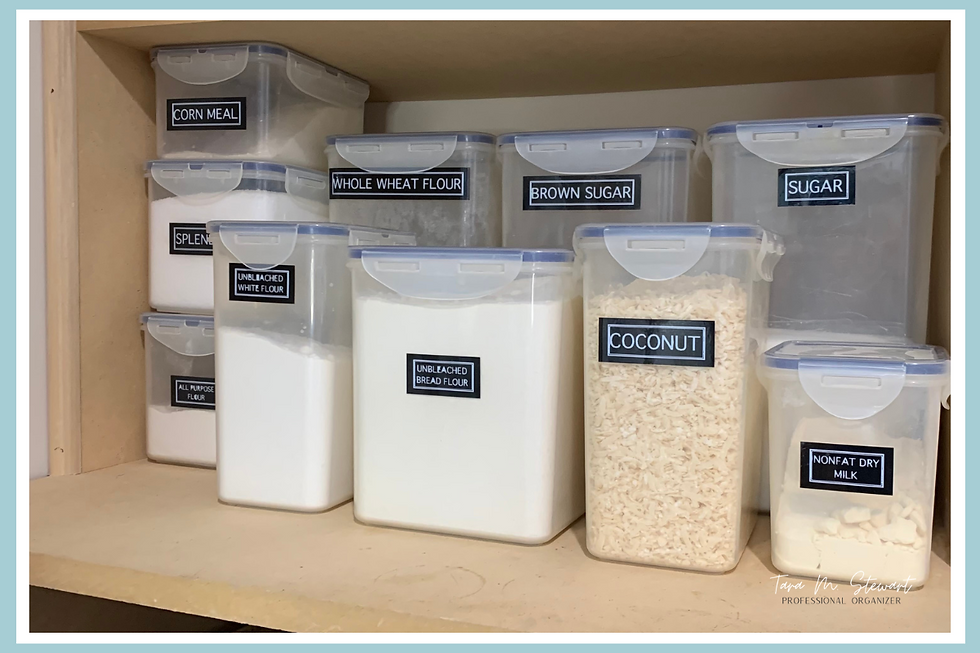
Inside Scoop: We only use .47” and .94” in BOTH white with black letters & black with white letters.

You can purchase tape in a variety of colors along with glitter and matte tapes.
The apps that go with the label maker are easy to use
The apps come with pre-designed templates, however, our team typically just uses a basic font with no border to make it as readable as possible.
Inside Scoop: Our Team uses the P-Touch Design&Print 2 app found on the Apple store here and at the Google Play store here.
My favorite, but little known feature
The P-Touch Design&Print 2 app allows you to save your label designs. For us, this comes in handy for projects - we might save a font combo by client or by project room. For you, this would be useful if you change font size, style and layout from room to room.
The one thing that drives me NUTS about this label maker
Before the label starts to print, approximately one inch of label tape is spit out and cut THEN it prints your label. Label tape isn’t cheap and this drives me nuts! But according to Brother:
“There is approximately one inch of space between the print head and the cutter blade within the PTouch label printer. The three layers of material that make up all PTouch labels must pass over this space in order to be sealed correctly and to feed correctly. Ordinarily a small piece of tape, 1 inch long, will first precede the printed label to ensure that this happens. This extra feed material cannot be eliminated. “
To read what Brother suggests on how to reduce the amount of tape wasted, click here!
Overall, this little guy does the trick and the app that goes with it has more options than you’ll ever need. Everything from emojis, icons, boarders, printing vertically or horizontally, as well as adding your own photo image! It does come with some starter tape and the USB cable (it does not include a charging box - however most of us have extra USB boxes with plugs around the house).
Kommentare